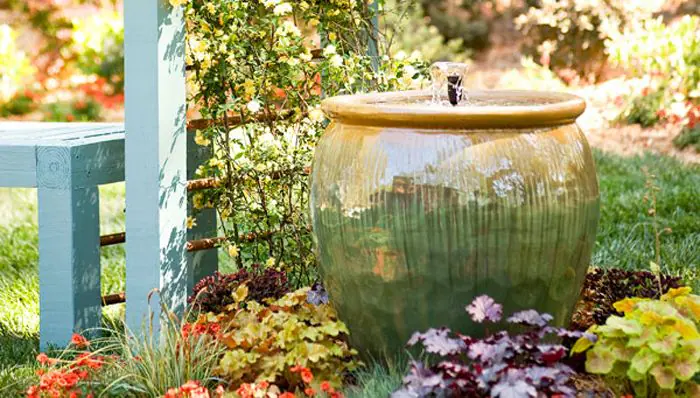
Transform Your Outdoor Retreat: A Step-by-Step Guide to Building a Serene Garden Water Fountain
 Nothing elevates the tranquility of a garden like the soothing sound of flowing water. If you’re looking for a simple, yet impactful DIY landscaping project, building a garden water fountain might be the perfect touch for your outdoor oasis - especially now that the weather is a little more tolerable! Here’s how you can create your own elegant fountain using a ceramic pot and a few basic tools.
Why Build Your Own Garden Fountain?
Building a water fountain is more than just a weekend project; it's an investment in your well-being. The soft sound of running water promotes relaxation and can elevate the aesthetic of any garden. Plus, it's easier than you think!

Step 1: Seal Off the Drainage Holes
Your garden fountain starts with a glazed ceramic pot. First, turn the pot upside down and clean any rough edges around the drainage holes. To ensure no water leaks, you’ll need to seal these holes using rubber plugs and silicone caulk. Tip: When inserting the plugs, leave about 1/4 inch sticking out and then apply a generous amount of sealant around the edges.
Pro Tip: Make sure the sealant is fully dry before moving on to the next step. A leaky pot can ruin your entire project!
Step 2: Install the Water Pump
This is where the magic happens! Grab a 5-gallon plastic bucket, turn it upside down, and drill several holes in the bottom. Then, cut a small opening along the rim for the pump’s power cord. Set the bucket inside your pot, facedown, and place the submersible water pump on top.
Pro Tip: A fountain pump with adjustable flow settings gives you control over the water speed, which helps set the perfect relaxing mood for your garden.
Step 3: Thread the Pump’s Cord
To keep things tidy, it’s important to thread the pump’s cord through the pot's drainage hole. Mark the cord length, then use a rubber plug to seal the hole around the cord. This helps protect your fountain's electrical components from water damage.
Reminder: Silicone caulk is your best friend here! Use it liberally to seal any openings around the cord.
Step 4: Set the Pot in Place
Find the perfect location for your fountain. Make sure to dig a small trench for the power cord under the pot so it doesn’t cause uneven tilting. If you want additional stability, you can place the pot on rectangular paving stones. T his not only keeps the pot level but also leaves a gap for the cord to run through.
Fun Fact: Pavers also help prevent soil erosion under your fountain, keeping everything in place during heavy rains.
Step 5: Fill the Fountain with River Rock and Water
Your fountain is almost complete! Drill a few holes in the second plastic bucket and fill it with river rocks. Wash them thoroughly to remove any dust, then layer the rocks inside the pot until they’re about 2 inches below the rim. Finally, adjust the pump’s spout to your preferred height and fill the pot with water.
Pro Tip: A gentle spray nozzle can create a soothing water sound, while a bubbler attachment can add a fun, dynamic element to your fountain.
My Final Thoughts: Enjoy the Peaceful Ambiance of Your DIY Fountain
Building a garden water fountain is the perfect way to bring calm and beauty into your outdoor space. Not only is this project budget-friendly and relatively easy, but it also offers long-lasting enjoyment. Whether you’re sipping coffee in the morning or winding down in the evening, the gentle sounds of your fountain will transform your garden into a serene retreat.
And remember, if you or anyone you know is planning on transforming their outdoor space—or even their home—I'm here to help with all your real estate needs. Whether you’re buying, selling, or simply looking for ways to add value to your home, don't hesitate to reach out!
Get creative, have fun, and enjoy your new garden fountain! Feel free to share pictures of your project—I’d love to see what you come up with. If you know anyone else looking to elevate their home’s outdoor space, send them this guide and my way!
Source: Lowes
If you have any questions, want to know what the current value of your home is, would like to book an appointment with me or are looking for some free real estate related educational reports; make sure to Check Out My Link tree
Search for your next dream home or find out the value of your current home on my website www.Realvolutionhomes.com
Dan McDevitt
Cummings & Company Realtors
Team Leader Realvolution Homes Group


